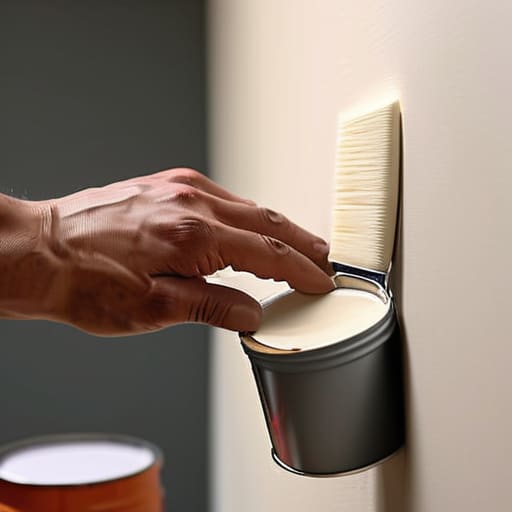
A No-nonsense Guide to Repainting Your Space: Crafting a Resilient Finish That Actually Lasts
I was standing in my studio last Tuesday, staring at a patch of uneven, streaky sage green that looked more like a bruised sky than a serene sanctuary, and it hit me: most people treat painting like a superficial mask rather than a foundational layer. We often think that picking a beautiful pigment is the hard part, but the truth is that knowing how to repaint a room properly has almost nothing to do with the color itself and everything to do with the preparation of the substrate. Just like when I’m prepping a new glass terrarium—I wouldn’t dream of just tossing moss onto dry sand without building a nutrient-rich base first—you cannot expect a professional finish if you treat your walls like an afterthought.
In this guide, I’m stripping away the glossy, high-pressure sales pitches from big-box hardware stores to give you the real, grounded mechanics of a successful transformation. I’ll walk you through the essential stages of cleaning, sanding, and priming so your new aesthetic doesn’t just sit on the surface, but truly takes root in your home. Whether you’re looking to refresh a single corner or overhaul your entire living ecosystem, you’ll gain the practical, no-nonsense techniques needed to achieve a finish that is as resilient as it is beautiful.
Guide Overview
Tools & Supplies
- Paint rollers and tray for large surfaces
- Angled sash brushes for edges and corners
- Painter's tape for protecting trim and ceilings
- Sandpaper for smoothing walls
- Interior paint (1-2 gallons per room)
- Painter's tape (1-2 rolls)
- Drop cloths (2-3 large sheets)
- Spackle (1 small container for holes)
Step-by-Step Instructions
- 1. Before you even crack open a paint can, you have to treat your room like a new terrarium: you need to clear the ground. Move your furniture to the center of the room and cover everything with drop cloths. I always tell my students that you can’t build a resilient ecosystem on a cluttered foundation, so take the time to remove wall art, switch plates, and curtains. If you skip this, you aren’t just risking a drip; you’re inviting chaos into your sanctuary.
- 2. Next, we move into the “soil preparation” phase, which is arguably the most critical step for long-term success. Inspect your walls for any cracks, dents, or peeling patches. Use a bit of spackle to fill those imperfections, and once it’s dry, sand it down until it’s perfectly flush with the surrounding surface. Think of it as smoothing out the topography of a landscape; if the base isn’t level, your final “canopy” of color will look uneven and distressed.
- 3. Now, it’s time to protect the edges of your ecosystem. Apply painter’s tape along the baseboards, window frames, and the ceiling line. I’ve learned the hard way that precision is everything when you’re trying to create clean, intentional boundaries. Press the tape down firmly with your finger or a putty knife to ensure no pigment seeps underneath, because a messy edge can disrupt the entire visual harmony of the space.
- 4. Once your boundaries are set, grab a brush and start “cutting in.” This means painting a narrow strip of color along the edges, corners, and around trim where a roller simply can’t reach. It’s a bit more meditative and slow-paced than the rest of the job, much like tending to delicate mosses in a miniature world, but it ensures that every inch of your wall is primed for the main event.
- 5. Now we can bring in the heavy machinery—the roller. Start with your largest sections, working in small, manageable patches rather than trying to tackle a whole wall at once. Use a “W” or “M” motion to distribute the paint evenly, which prevents those dreaded streaks and ensures a consistent texture. It’s all about creating a seamless layer that feels like a natural extension of the architecture.
- 6. Patience is your greatest tool here, so resist the urge to rush into a second coat. Let the first layer dry completely—I usually check the can for specific timing, but patience is a virtue in both urban planning and interior design. Applying a second coat is what transforms a simple color change into a deep, professional-grade finish that truly resonates with the light in the room.
- 7. Finally, as the paint cures, it’s time for the “deconstruction” phase. Remove your painter’s tape while the paint is still slightly tacky to prevent any chipping. Once the tape is gone, clean your brushes immediately and put your furniture back in place. You’ve just successfully rebalanced your indoor environment, and I hope you take a moment to sit in the stillness and appreciate the newly restored harmony you’ve created.
Gathering Essential Painting Tools and Supplies for Lasting Change
As you move from the physical preparation of your walls to the actual application of color, remember that a room’s transformation is as much about the emotional atmosphere as it is about the pigment. Just as I carefully balance the humidity and light in my “Rachel Carson” terrarium to ensure every leaf finds its place, you want to ensure the energy of your space feels welcoming and alive. If you find that the process of refreshing your home brings up a desire to connect more deeply with others or share your creative journey, I’ve found that engaging in a meaningful conversation for older adults can be a beautiful way to find shared inspiration and community during these seasons of personal renewal.
Before you dive into the actual color, think of your toolkit as the specialized equipment needed to cultivate a new micro-climate. Just as I wouldn’t dream of starting a new terrarium—like my latest little mossy wonder, “Rachel Carson”—without the right substrate and tweezers, you shouldn’t approach a wall without the right gear. Investing in high-quality essential painting tools and supplies isn’t just about vanity; it’s about ensuring the longevity of your work. A cheap, shedding brush is like planting seeds in poor soil—it might look okay for a moment, but the foundation will eventually fail you.
I always tell my clients that the secret to a professional look lies in the subtle details of your kit. If you want to avoid that dreaded “streaky” look, prioritize a high-density foam roller and a set of synthetic brushes that hold their shape. This is particularly vital when learning how to cut in edges with a brush, as it allows for the precision required to mimic the clean lines found in nature. By choosing tools that respect the surface, you aren’t just painting a wall; you are architecting a lasting sanctuary.
Mastering How to Prep Walls for Painting and Harmonious Layers
Think of your wall surface like the substrate of one of my terrariums—if the foundation isn’t balanced, the entire ecosystem will eventually struggle. Before you even think about opening a can of color, you must understand how to prep walls for painting by treating them with the same respect you’d give a delicate moss bed. This means more than just a quick wipe; it’s about sanding down those rough patches and filling every hairline crack. If you skip this, your new layer of color will simply highlight the imperfections of the old one rather than masking them.
Once the surface is pristine, you enter the most vital stage of the ritual: the priming. I always say that the best way to apply primer is to view it as the “nutrient-rich soil” that allows your pigment to truly bond and flourish. Don’t rush this. A high-quality primer ensures that your final color looks even and vibrant, rather than blotchy or streaky. By investing this extra time into the preparation phase, you aren’t just painting a room; you are cultivating a resilient foundation for a space that will feel refreshed and harmonious for years to come.
Cultivating Your Canvas: Five Nuances for a Flourishing Finish
- Think of your paint like a delicate moss in one of my terrariums—it needs the right environment to thrive. Don’t rush the drying process; if you apply a second coat before the first has truly settled into its new home, you’re essentially inviting structural instability into your sanctuary.
- Lighting is the heartbeat of any ecosystem, and it’s the same for your walls. Before you commit to a gallon of color, observe how the light dances across the surface at noon versus dusk. A shade that looks like a vibrant meadow in the morning might turn into a moody, shadowed forest by twilight.
- Respect the boundaries of your landscape. Just as I use specialized tweezers to place tiny stones in a miniature ecosystem, use high-quality painter’s tape to define your edges. It’s the difference between a wild, overgrown thicket and a beautifully curated urban garden.
- Don’t fear the primer, even if the walls look “fine” to the naked eye. I view primer as the nutrient-rich soil that prepares the ground; it ensures your color isn’t just sitting on the surface, but is actually bonding with the architecture to create something resilient and long-lasting.
- Listen to the rhythm of your brush. Whether you’re using a roller or a brush, avoid the temptation to overwork the paint. Let the tool do the heavy lifting with steady, purposeful strokes, much like the intentional placement of a new sapling, to avoid those unsightly streaks that disrupt the visual harmony of your space.
Cultivating Your Finished Sanctuary
As you step back to survey your handiwork, remember that a successful paint job is much more than just a fresh coat of pigment; it is the culmination of careful preparation and intentional layering. By meticulously selecting your tools, prepping your surfaces to ensure a stable foundation, and applying your colors with patience, you have moved beyond a mere DIY task and into the realm of true environmental stewardship within your own home. You haven’t just changed a color; you have stabilized the “soil” of your living space, ensuring that your aesthetic choices are built to last rather than simply masking temporary imperfections.
I often think about my terrariums—like my little “Rachel Carson” ecosystem currently thriving on my windowsill—and how every small adjustment contributes to a larger, more resilient whole. Your home is your personal ecosystem, a vital space that nourishes your spirit and reflects your values. I hope this process has reminded you that even the smallest act of renewal can be a profound way to reclaim your connection to your surroundings. Go ahead, breathe in that fresh, clean air, and take pride in knowing you’ve built a more vibrant, harmonious world, one room at a time.

Leave a Reply
You must be logged in to post a comment.